Rocket Reply – How to Set Up an Auto-Responder Campaign
Rocket Reply – How to Set Up an Auto-Responder Campaign
In This Article
- Q: Why Should I Create Auto-Responder Campaigns?
- Q: How Do I Create a Campaign?
Why Should I Create Auto-Responder Campaigns?
An Auto Responder Campaign is a key component to your growing business. By automating emails you work less and accomplish more. Auto Responder Campaigns make key components of your customer service and ranking strategy automated, easy, and intuitive.
With Auto Responder Campaigns you can reach out to each and every single customer, making an authentic connection, getting genuine feedback and potentially landing a 5 Star Review with minimal work on your part.
This sets you apart from your competition, who are more than likely manually responding (and missing many) customer emails. Giving you a leg up by building a rapport with your audience that lands you more reviews and repeat business.
Step by Step Guide to Create a Campaign
- In the Navigation menu, select Campaigns
- Select the + New Campaign button and then click on (Not Saved) in the line that appears below.
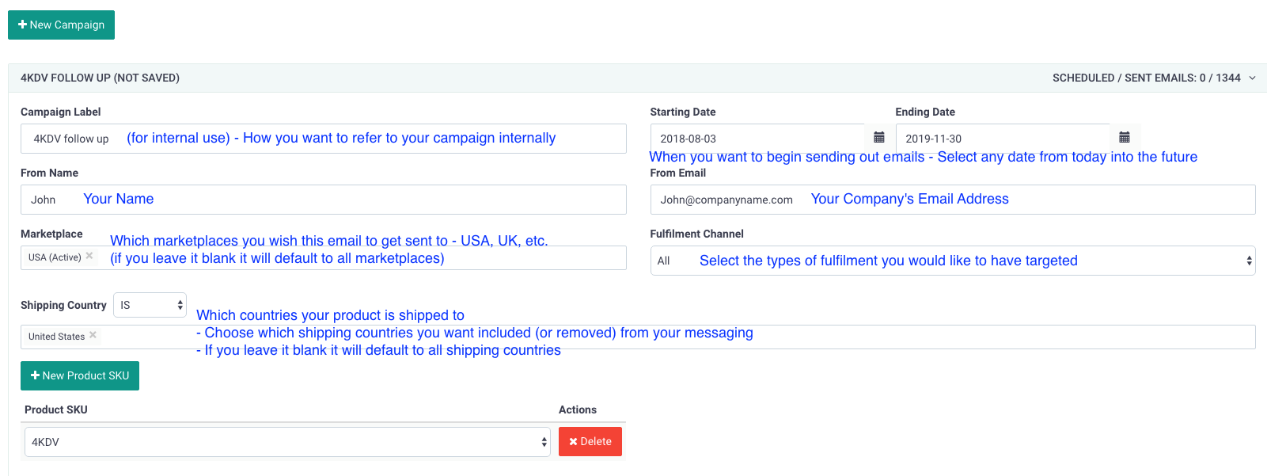
- A new campaign template will open, fill in the top part of the form with (If you leave these blank they will default to all connected marketplaces, shipping countries and fulfillment channels)
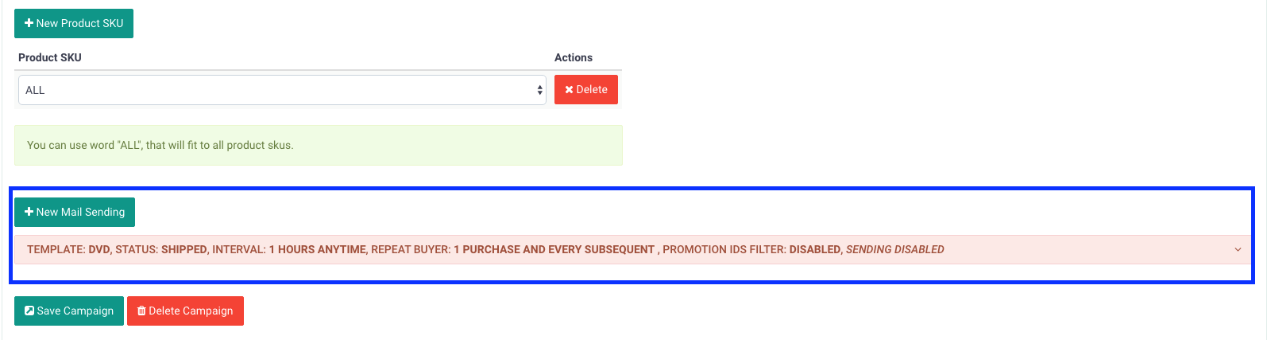
- Click on the +New Products SKU button to add your products. You can also choose to type the word “ALL” in the Product box to have the auto responder sent out to every product that you list on your amazon sellers account
- Next you can select a new email in the series by clicking the +New Mail Sending and then clicking on the Red Box below it
PRO TIP: For the same target SKU, add multiple New Mail Sendings to a Campaign instead of multiple Campaigns to better manage the followup emails.
- After you click the red box, fill out the following filters and click Disabled
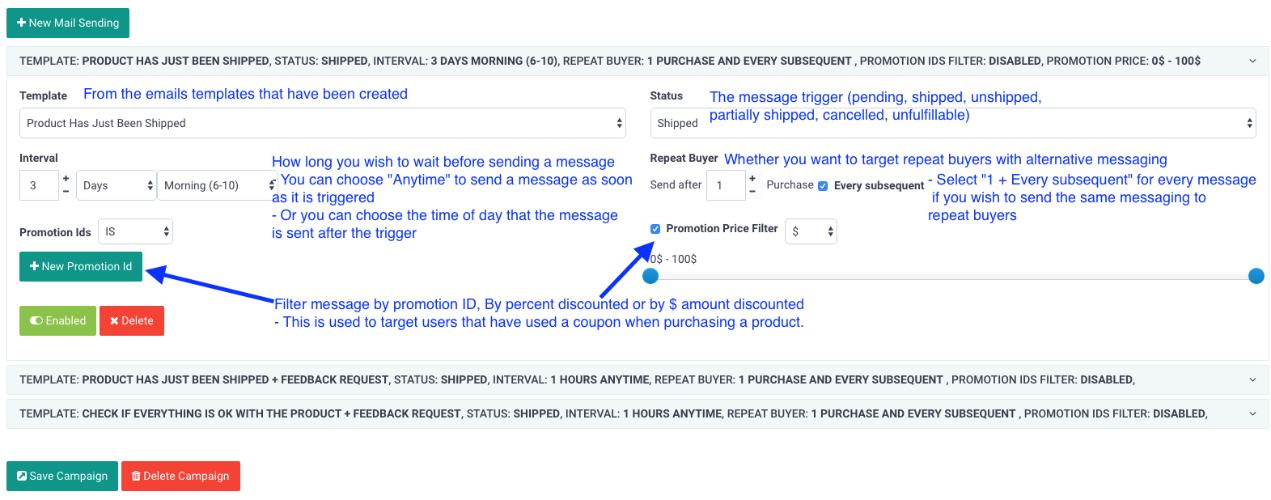
- Remember to click the Disabled button in each email to turn the emails on. The button should turn green and show Enabled and the Email box will turn green.

- Click on Save Campaign to save your settings.
That’s all there is to it. You’ve now created your first Automated Campaign!