Rocket Reply – How to Create a Template
In This Article
- Q: Why Should I Use Auto-Responder Templates?
- Q: How Do I Set Up Email Templates?
Why Should I Use Auto-Responder Templates?
An Auto-Responder Template is the most efficient way of automizing and personalizing your customer engagement. With an Auto-Responder Template you work less and accomplish more by letting Rocket Reply do most of the work for you.
With an Auto-Responder Template you can make an authentic connection with every single one of your customers without having to do all the work individually. This encourages more genuine engagement and therefore more 5 Star Reviews with the least amount of work on your part.
You set yourself apart from your competition by instantly referring to every one of your customers by name, including what country, city, or state they’re from, and referring to their specific product, all without lifting a finger (once your perfect template is complete). You not only get a leg up on the competition, but you work a lot less than they do too!
Remember, it’s not how hard you work, but how smart you work. And you can’t get any smarter than Rocket Reply.
Setting Up Your Email Templates
You can send any sequence of emails to your customers, but we recommend you set up a basic 3 email sequence first and foremost. Don’t forget that you can A/B test different emails to determine which is most effective.
IMPORTANT: Please read Amazon’s Seller Guidelines before you do anything. Auto Responder is an incredibly powerful tool, but if used improperly can result in your account being suspended or banned by Amazon.
How To Build a Template
— Under the Auto Responder category in the Navigation menu, select Templates
— Click the Blue + New Template button and then Click on the New Template (not saved) line that appears below.

— A template window will appear where you can edit the standard template to suit your needs.
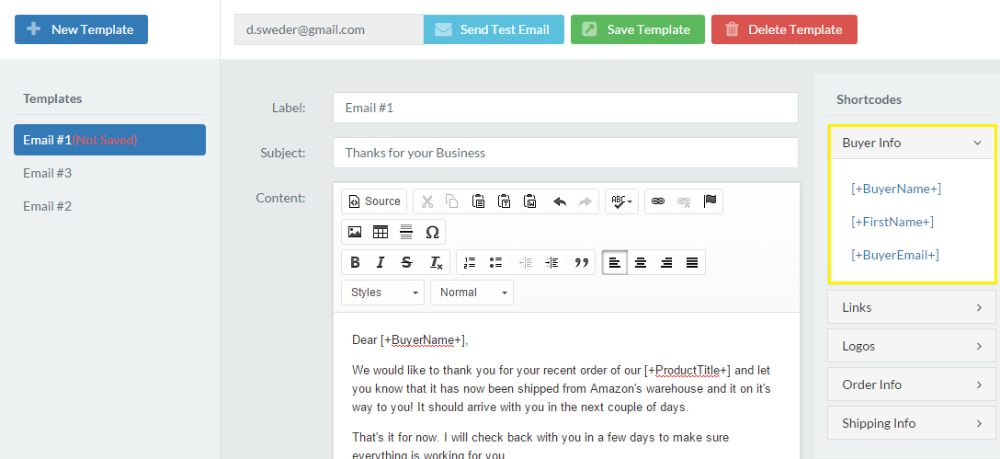
— Shortcodes on the right can be Copied into the Content Box, which will auto populate messages with customer data from Amazon or your business information saved in Rocket Reply.
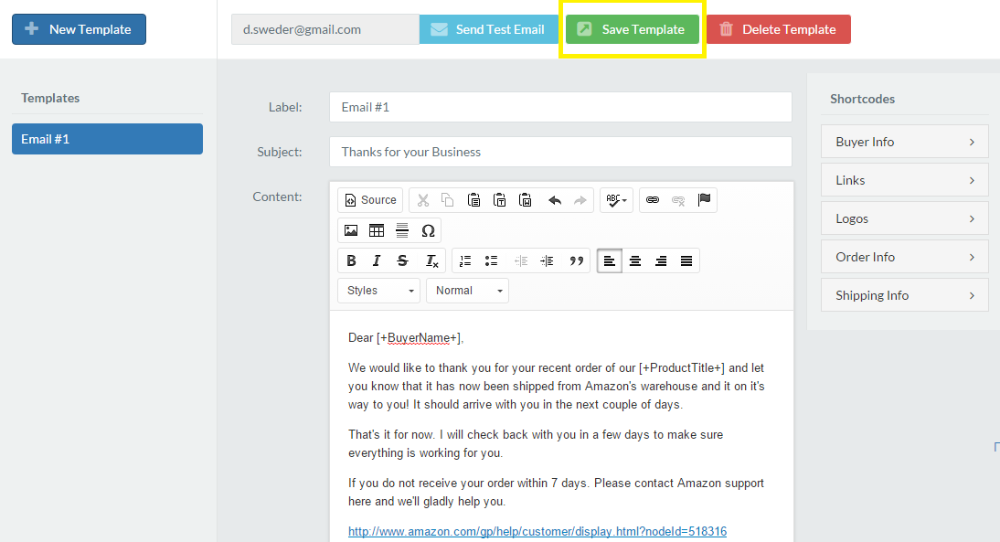
— After you have finished editing the template save it by clicking the green Save Template button at the top of the window.

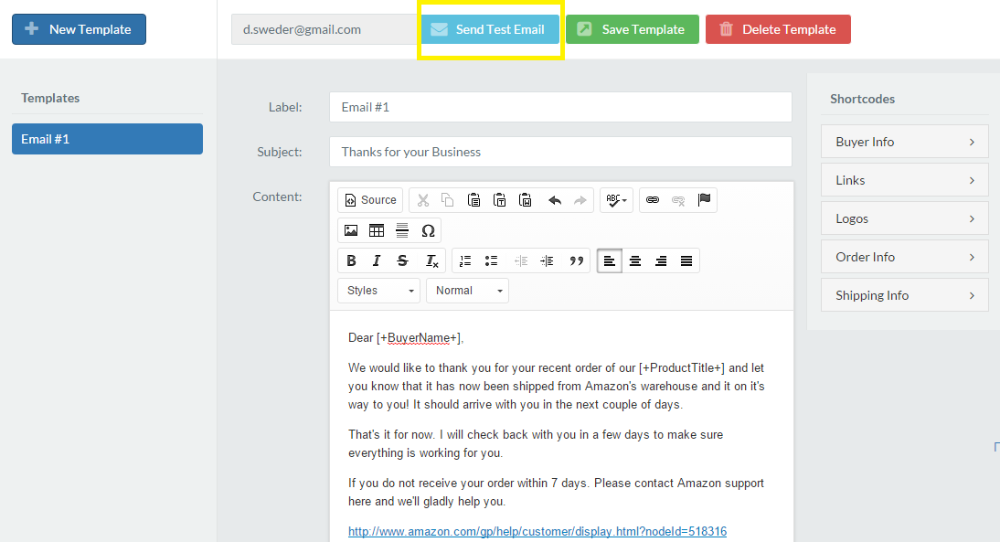
— Once saved, you can send a test email to yourself by clicking the blue Send Test Email button to guarantee your message has the proper links and the logo looks right.

Rocket Reply – How to Create a Template
In This Article
- Q: Why Should I Use Auto-Responder Templates?
- Q: How Do I Set Up Email Templates?
Why Should I Use Auto-Responder Templates?
An Auto-Responder Template is the most efficient way of automizing and personalizing your customer engagement. With an Auto-Responder Template you work less and accomplish more by letting Rocket Reply do most of the work for you.
With an Auto-Responder Template you can make an authentic connection with every single one of your customers without having to do all the work individually. This encourages more genuine engagement and therefore more 5 Star Reviews with the least amount of work on your part.
You set yourself apart from your competition by instantly referring to every one of your customers by name, including what country, city, or state they’re from, and referring to their specific product, all without lifting a finger (once your perfect template is complete). You not only get a leg up on the competition, but you work a lot less than they do too!
Remember, it’s not how hard you work, but how smart you work. And you can’t get any smarter than Rocket Reply.
Setting Up Your Email Templates
You can send any sequence of emails to your customers, but we recommend you set up a basic 3 email sequence first and foremost. Don’t forget that you can A/B test different emails to determine which is most effective.
IMPORTANT: Please read Amazon’s Seller Guidelines before you do anything. Auto Responder is an incredibly powerful tool, but if used improperly can result in your account being suspended or banned by Amazon.
How To Build a Template
— Under the Auto Responder category in the Navigation menu, select Templates
— Click the Blue + New Template button and then Click on the New Template (not saved) line that appears below.

— A template window will appear where you can edit the standard template to suit your needs.

— Shortcodes on the right can be Copied into the Content Box, which will auto populate messages with customer data from Amazon or your business information saved in Rocket Reply.

— After you have finished editing the template save it by clicking the green Save Template button at the top of the window.
— Once saved, you can send a test email to yourself by clicking the blue Send Test Email button to guarantee your message has the proper links and the logo looks right.